Selecting the printer
Printer selection dialog
Every time you start the remote desktop session, all printers from your local computer are accessible on the remote side as <PrinterName> (FabulaTech) - session N. Simply start printing from any application and select the required printer in the standard dialog:

The printer selection dialog may vary between different applications, but in most of these dialogs you can also find a button that opens the Printing preferences.
Setting the default printer
Each virtual FabulaTech printer can be set as the default one in the standard way through Windows Settings.
Alternatively, you can click on the Printer for Remote Desktop icon in the system tray and set the default printer in the menu:
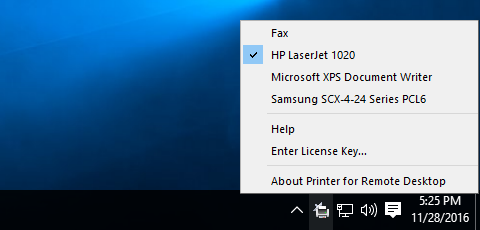
Only printers from your local side can be set as default through the tray menu. If there are additional printers on the remote system, they will not be present in the Printer for Remote Desktop menu.
Printer for Remote Desktop allows you to control which printer is assigned as the default when a user logs in to a remote session. By default, the user’s local default printer is assigned in the remote session at logon, unless another third-party product is used to reassign a default printer. This behavior can be changed using GPO settings.